Blog February 2017

Latest

Posted On: October 22, 2018
Posted On: September 10, 2018
Posted On: June 11, 2018
Posted On: April 23, 2018
Posted On: April 02, 2018

Subscribe

Via Email:

SPRING SAFETY CHECK PART 1

Posted On: February 27, 2017


Launch Into Spring  Part 1

Here’s a Spring Fitting Out Safety Checklist.

Complete A safety inspection of the engine, hull, and other systems.

We recommend using the services of a qualified professional if you aren’t comfortable with the tasks.

Out of the Water

  • Inspect and lubricate seacocks. Hoses and hose clamps (two at each fitting below or near the waterline) should be inspected and replaced as necessary. This is also the best time to replace gate valves, if any, with seacocks. Gate valves are prone to failure and not as reliable as seacocks. You also can’t glance at a gate valve to see that it’s been closed.
  • Replace deteriorated zincs. They disintegrate and give a good indication of what would happen to vital underwater machinery if the zincs were not there. Note: If the zinc has vanished or has been reduced to powder, check the other metal surfaces, especially underwater, to ensure they didn’t also suffer from electrolysis. Zincs that disappear after less than a season indicate a serious problem with the boat’s bonding and/or electrical system. (Look first for chafed wires or battery cables, which also can cause a fire.)
  • Inspect prop(s) for dings, pitting, and distortion that can create excessive vibration and can loosen everything from screws and bulkheads to dental fillings. Make sure cotter pins are secure. “Tired” props, incidentally, can be rejuvenated by a machine shop. Finally, grip the prop and try moving the shaft. Looseness indicates the cutlass bearing probably needs to be replaced.
  • Check to make sure the rudder stock hasn’t been bent. Also try moving the rudder: Any looseness must be corrected (the remedy depends on the type of installation).
  • Inspect the hull for blisters, distortion, and stress cracks. Small “pinhead” blisters can be dried, sanded, and filled. Large blisters may require professional attention. Distortion and/or stress cracks are two other hull problems that should be addressed by a marine surveyor or repairer.
  • Make sure the engine intake sea strainer is free of corrosion and is properly secured. Strainers that weren’t drained properly in the fall could’ve been bent by ice over the winter. Replace questionable parts.


Outdrives and Outboards

  • Inspect rubber outdrive bellows for cracked, dried, and/or deteriorated spots (look in the folds). Replace suspect bellows.
  • Replace deteriorated outdrive zincs.
  • Check power steering and power trim oil levels. Follow the manufacturer’s maintenance schedule or use a factory-authorized mechanic.

Control Cables

  • Inspect Outer Jacket. Cracks or swelling indicate corrosion and mean the cable must be replaced. (Note: Don’t try to remedy the problem by squirting lubricant into the cracks or wrapping duct tape around the outer jacket; most lubricants are incompatible and will only make things worse.)


0

WASHINGTON'S BIRTHDAY

Posted On: February 22, 2017

Washington's Birthday has a history as old as our country. It was celebrated publicly for the first time in the late 18th century, while George Washington was still president.

George Washington was born on either Feb. 11, 1731 or Feb. 22, 1732 depending on which calendar you consult.

At the time, England and its colonies were following the Julian calendar , instituted in 46 B.C. by the eponymous Julius Caesar. By that calendar, Washington was born on Feb. 11, 1731. But in 1752, England switched to the Gregorian calendar, which is still in use today, and that threw everything off.

Washington's Birthday became official in 1885, when President Chester Arthur signed a bill making it a federal holiday. Meanwhile, there was President Lincoln's birthday on Feb. 12, which never became a federal holiday but was celebrated as a legal holiday in many states outside the old Confederacy.

In 1968, Congress passed the Monday Holidays Act, which moved the official observance of Washington's birthday from Feb. 22 to the third Monday in February. Some reformers had wanted to change the name of the holiday as well, to Presidents' Day, in honor of both Lincoln and Washington, but that proposal was rejected by Congress, and the holiday remained officially Washington's Birthday.

Nevertheless, there was a popular misconception that the day had been officially renamed, a misconception only reinforced by the fact that the third Monday in February can only occur between Feb. 15 and Feb. 21. This means that the holiday is always after Lincoln's birthday and before Washington's birthday, without ever coinciding with either. Furthermore, some states which had previously celebrated Lincoln's Birthday dropped the observance after the federal holiday reforms, supporting the notion that the two presidential birthdays had been combined.

While the name change has never been authorized by Congress, it has gained a strong hold on the public consciousness, and is generally used on calendars, in advertising, and even by many government agencies. There have been attempts to introduce legislation requiring federal agencies to call the day Washington's Birthday, but these have never gotten very far. No matter what's in the law books, the popular usage is now well established.


0

CHART PLOTTERS

Posted On: February 20, 2017


BASED ON AN ARTICLE IN BOATUS

Data, Not Intelligence

Chartplotters have made everyday navigation a dream. But, like all technology, they have their limits. The first is the user. As in the case above, if you're going fast enough it's possible that the screen might not refresh quickly enough to keep up with your position. That could be because of processor speed, but it could also be a function of the GPS chip, and the amount of data you're displaying. When you are navigating in areas with obstructions, you need to rely on something lower tech than your chartplotter — your throttle. All you have to do is pull it back. While modern plotters have better processing power and faster refresh times, slowing down when you're unsure can prevent a big headache later.

Refresh rate is just one of several things you need to understand about your plotter. Chartplotters can provide so much information that usually a few hours of training are needed to use them well. But there's a strong temptation to "hook 'em up and start pushing buttons." It's fun and you want to get out on the water. But push those buttons for awhile at the dock with the manual until you become familiar with your new tool. You may be surprised how much information it can provide you, if you just use it correctly.

For example, you need to know if your chartplotter is set to give you latitude and longitude in degrees, minutes, and seconds, or degrees and decimal degrees. Failure to report and/or record position without knowing which "language" is being used has resulted in serious errors, even death.

Getting A Fix

Seeing your boat's icon sailing along on the screen, up in the trees, isn't reassuring. But it's a common event with chartplotters. They're only as accurate as the cartography they're using, and no cartography can be perfect. Things change, particularly on the water. Even the most current and carefully done "maps" can be rendered inaccurate by a storm or grounded barge causing a shoal to shift, or by a change to an aid to navigation. You can and should regularly update your cartography. But even that precaution doesn't completely preclude inaccuracies.

Chartplotters can't change the fact that we're boating in the real world. Newer cartography and plotters offer access to "user-generated" data, which is uploaded by your fellow boaters and can in theory show you current bottom contours. But these are still only as accurate as the most recent upload, and you never know whether the person who reported has a properly calibrated depth sounder.

Even when the cartography is accurate, not all fixes are created equal. The accuracy of your position on the chart depends upon how many GPS signals the chartplotter is receiving, the strength of those signals, and the angle of those signals to one another and to the receiver. Most chartplotters have an icon that will alert you if the accuracy of the fix has deteriorated. If you see that icon, proceed with caution. On most chartplotters, you can check the signal quality by accessing a screen that shows what signals the chartplotter is receiving and how strong they are.

Plotters are only as accurate as the GPS information they're receiving and, as precise as this has become, myriads of things can throw its accuracy off. This includes equipment glitches, from what's on your boat to what's in space, temporary shutdown of satellites for maintenance, and even the possibility of deliberate interference by government entities.

0

RESCUING A DROWNING VICTIM WHEN YOU ARE ON YOUR BOAT

Posted On: February 15, 2017


BASED ON AN ARTICLE IN BOATING


Rescuing a Drowning Victim by Boat

3,533 people drown on average in the United States every year. In response, the USSSA created guidelines to help educate everyone on how to handle a rescue situation for a drowning victim. The United States Coast Guard reported in its 2015 statistics that in 76 percent of all fatal boating accidents, the victims drowned. So here are some of those tips

One, Two, Eyes on You
When someone falls in the water, the first person on your boat who sees the victim needs to keep his eyes on the man overboard and point at him. That way, someone always has a view of the victim’s location if he is drifting in a current or struggling in rough seas.

Call for Help
Even if you think you have the situation under control, alert the authorities over the VHF radio. You may not be able to rescue the person on your own, and even if you do, he or she may need immediate medical ­attention that you can’t provide.

Circle the Boat
Don’t point the boat straight at the victim because your momentum might carry you over him, even after you cut the throttles. Circle around to the person, positioning the boat on the downwind side so that the wind does not push the boat on top of him.

Throw, Don’t Go
If the person in the water is conscious, try to reach him with your ­throwable PFD — a Coast Guard ­requirement to have on board. Be sure to cleat off the tag end of the line attached to it so you can haul in the victim after he grabs it. Also, consider having a weighted ball or monkey’s fist on board. Both are easier to throw longer distances and less susceptible to wind.
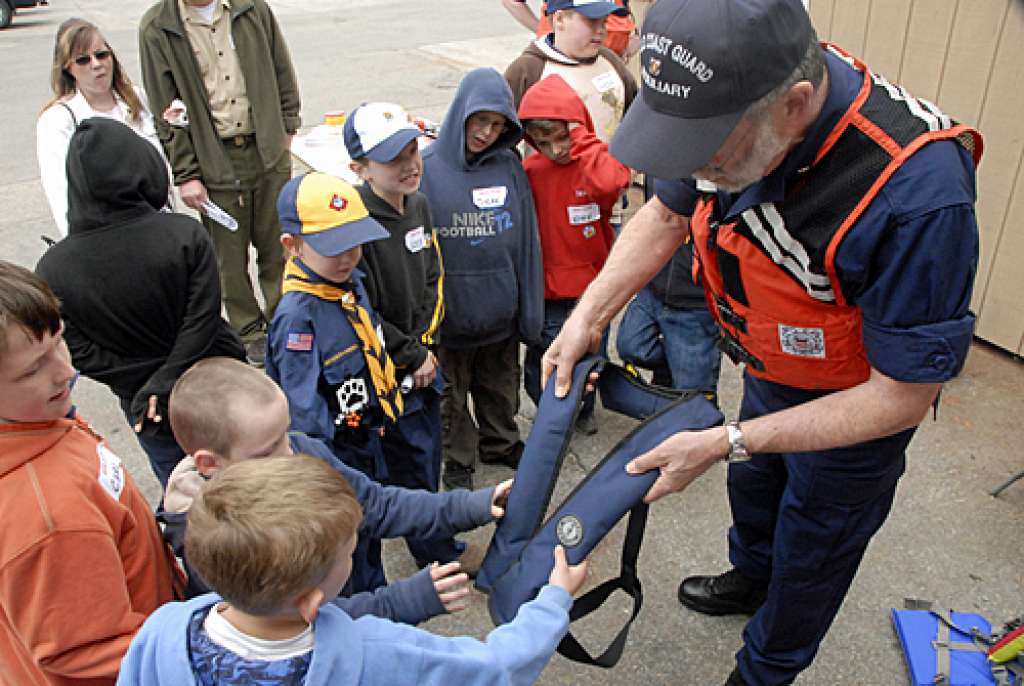
Wear A Life Jacket
If the drowning victim is unable to grab the throwable PFD or is struggling to stay afloat, you may have no choice but to send a crew member in with him. The swimmer should be tethered to the boat, if possible, and be wearing a life jacket before going overboard. Otherwise, you may wind up dealing with two people struggling in the water.

Attack From the Back
It’s always best to approach a drowning victim from behind, if possible. If he sees you and is panicking, he may try to grab your head or arms and push you underwater in the process. Grabbing from behind allows you to control the situation and keeps him from wrapping his arms around you.

It’s Not Over
Even if you are able to pull a drowning victim back on board the boat and everything seems OK, you should still get the person medical ­attention as fast as possible. The reason? Secondary drowning. As the USSSA notes: “People who experience a drowning incident can still have water in their lungs for hours afterward and need to be watched closely.” Be alert for breathing issues and seek help from a medical professional.

Help Yourself: Should you find yourself immersed in cold water in the early season, having on a life jacket is critical for staying safe. But a life jacket won’t protect you from hypothermia. One way to conserve heat is to use the HELP technique. The acronym stands for heat escape lessening posture. Pull your knees up to your chest and cross your arms over the front of the life jacket. The less you move, the more heat your body retains and the longer you can survive.

0

WAYS TO RUIN YOUR ENGINE

Posted On: February 13, 2017

Think you know how to keep your engine going? Well, you might but then again, you may not. You probably filter the fuel, change the oil, and make sure the cooling water is flowing. And, of course you've read the engine manual. Or have you? I'm betting there are lots of things you've missed in that little bible, and that once you got past Page 5, you only scanned the pictures.

Too bad, because even though you think you know what you're doing, you might be screwing up your engine by doing dumb things such as...

You Never Listen Turn a deaf ear to your boat. A sound that imitates a squealing pig probably means a belt is loose. A metallic tapping that keeps time with engine rpm means your valves, lifters, or rocker arms are in trouble. Grinding and grating metal could mean a water pump bearing is shot. If your exhaust gets louder and has a higher pitch, there's probably less cooling water running through it-check the water pump. Ignoring it is music to a mechanic's banker. Addressing it may cost you a few bucks but save you a ransom.

Stay Out of Hot Water. Install your thermostat backward so the heat-sensing part is located on the wrong side. This is a surefire way to guarantee your engine overheats. It's such an easy mistake, even the pros do it.

You Don't Look Down. Disregard engine gauges at your own expense. Airplane pilots are taught to regularly scan their gauges. They start at one side of the panel and pan slowly across, looking at everything, and then pan back the other way. With only a few gauges on a boat, this pan and scan shouldn't be a big deal. Some owners turn their gauges so the needles point up, to high noon, when running normal. It looks odd, but it's easier to recognize when a change occurs.

Turn Up Your Nose. Smell the fresh sea air and ignore the engine room's funk. A healthy engine has a distinctive odor. Take a whiff and remember it. Then when an odorous messenger shows up, you'll know something's wrong. The acrid stench of burnt rubber could come from a dry-running water pump impeller (look for a clogged water intake), not enough cooling water reaching the exhaust, a slipping V-belt, or a failed coupler in the stern drive. A hint of burnt oil might mean the engine was run hard, or if it's a strong odor, there's an oil leak dripping on the hot engine. A cloying sweet aroma indicates leaking antifreeze. And a smell like burnt hair could be an electrical short.

So take some advice, pay attention, and use the services of a professional.  

0

PREVENTIVE Rx FOR YOUR BOAT

Posted On: February 08, 2017


Want to lengthen your boating season this year?

Address these six things before they break and you'll have much more water time.

Nothing's worse than on-the-water breakdowns -- but some things can be fixed before they go poof in the night! Attack these six potential problems long before they strike.

Impeller Implosion
A water pump impeller is the classic example of something that always fails at the worst possible time. Impellers are often difficult -- if not impossible -- to change while you're rocking and rolling around in the bay. So don't wait. Most builders recommend replacing the impellers after three or four years, even if they still work. My advice? Replace each impeller every other year -- before it has the chance to even think about going bad.

Bonus tip: Freshwater flushes aren't only important for your cooling system, they're good for impellers, too. Salt-covered impellers will deteriorate quickly unless they're rinsed well, so flush often.

Get Connected
Battery connections are a terminal headache. They continually corrode, getting greener and more crusty, until one day your motor won't start. And after checking out a dozen other potential bugs, you'll eventually discover it's simply a bad battery connection. Get ahead of the problem. Clean your battery terminals and connections each year, and coat them with a thin layer of petroleum jelly to help ward off corrosion.

Oils Well That Ends Well
Oil (and oil filter) changes are the number one preventive maintenance chore. These changes prevent perhaps the most catastrophic problem a boater will ever face -- engine failure. But don't stop with changing only the engine oil. Make sure the lower unit gets fresh oil each year, too.

LED the Way
Lights are other items that are sure to fail, usually sooner rather than later, on both boats and trailers. And if a bulb goes out while on the road, you could get a ticket. Many new boats have LEDs instead of the old-fashioned bulbs, but not all. Check yours, and replace any bulbs with new, long-lasting LEDs.

Cracked Up
If you've had the same outboard engine for more than five or six years, it's a good bet that you've had a fuel line leak in the motor well. That last 2' of hose between the bilge and the outboard takes a constant beating from the sun, salt spray, and rain. As you run the boat or pump the ball, that hose is constantly flexing. Sooner or later, the fuel line's surface will crack. When you first see a crack, a leak is just a season or two away. Don't wait. Cut out the offending section of hose and replace it as soon as possible.

Bad Vibes
Over time, propellers get small chinks, burrs, and dings. You may not even notice the gradual change in how your boat runs. That's too bad because a dinged prop increases vibrations in a boat, and those vibrations can contribute to any number of problems. Do yourself a huge favor -- and save big repair bills down the line -- by replacing or reconditioning your prop. When is the time right? Cup four or five cotton balls lightly in your hand, and run them around the edge of each blade. If the prop is rough enough to grab a cotton ball out of your hand, it's rough enough to cause vibrations, which means the time to fix it is now.


0

APPLYING BOAT GRAPHICS

Posted On: February 06, 2017

How to Apply Boat Decals

 I’m often asked if I think putting decals and signage on a vessel is a task a do it your selfer can take on.

While I’m not a big advocate of it, I guess it depends on the patience and skill set of the person attempting it. Remember you have to live with the results.

To better understand the steps involved, here's an article which appeared in Boat magazine.

Install boat decals like a professional by following these steps

By Jim Hendricks March 14, 2016

Applying vinyl graphics as boat decals ranks as a methodical do-it-yourself project. To learn more, we sought guidance from Chris ­Youngash, owner of Wrap Works (wrapworks.com) in Costa Mesa, California, and a 15-year industry veteran. We followed along as he installed a boat name on a Pathfinder Tournament 2200 bay boat while it sat on a trailer.


In ordering a graphic, make sure the shop utilizes high-performance cast-vinyl material, Youngash says. It is less likely to shrink than the vinyl used at a neighborhood sign shop, and it’s UV stabilized. Both parameters are critical in a marine environment

Cost depends on the size, colors and complexity. The 11-by-72-inch digital print we installed cost $125. Most vinyl-graphic shops also offer design services (minimum $75 at Wrap Works) to guide you, either in person or via email, in creating a graphic that meets your desires, fits the space and complements your boat. Today’s digital print technology allows you to integrate vivid images and create virtually any concept you wish.


Getting Started

Skill Level: 4/5

Time to Completion: 1.5 Hours


Tools and Supplies

* 11-by-72-inch vinyl boat name ready to apply ($125 per side; wrapworks.com)

* Flexible plastic squeegee (included with decal)

* 70-percent isopropyl alcohol ($2.27/16-ounce bottle; cvs.com)

* Spray bottle

* Microfiber towels

* Tape measure

* Grease pencil

* Masking tape

* Scissors

* X-Acto knife

* Seal-It-Pen ($11.60; image1impact.com).

  1. Clean the Surface
    Choose a calm, windless day with air temperatures above 65 degrees Fahrenheit to apply the decal. Start your project by washing the application surface with soap and water to remove any salt or scum, rinse liberally with water, and dry with a clean towel to avoid water spots. Next, spray a 70-percent isopropyl alcohol solution across the entire area and wipe it down with a clean microfiber towel to remove any residual wax, grease or oil from the application surface.
  2. Find the Center
    Use a tape measure or yard stick to find the vertical center of the area where you want to apply the decal and mark it with a grease pencil above the application area. The vinyl graphic you ordered will come sandwiched between backing paper and semi-transparent transfer paper. Lightly fold it in half lengthwise; the crease will indicate the vertical center of the decal. Align the crease with the mark on the hull and roughly position the decal with pieces of masking tape.
  3. Position the Graphic
    Align the top of the decal (not the paper) to a horizontal reference line, such as the rub rail underside, to create pleasing and consistent spacing between the reference line and the top of the graphic from front to back. Once happy with the positioning, run a long piece of masking tape across the top edge of the graphic’s paper carrier and remove any small pieces of tape. This serves as a temporary “hinge” at the top of the decal. Leave it in place until step 5.
  4. Peel Away Backing
    With individual letters or elements, use scissors to cut between them to make this process more manageable. Or you can leave the decal intact. In either case, peel away the backing paper from the top, allowing the decal to lightly adhere as you pull down on the backing. If the decal wrinkles anywhere, quickly pull it away with the transfer paper and smoothly put it back down. Press out air bubbles with the squeegee, working firmly from the center outward.
  5. Remove the Transfer Paper
    Remove the strip of masking tape at the top, then peel off the transfer paper, beginning at the upper left corner, pulling gently at a 45-degree downward angle but nearly parallel to the hull surface. The paper might tear; if it does, resume at the upper left corner. With the transfer paper removed, the centers of letters, such as D, O or P, might still contain backing paper. Carefully peel these sections away; an X-Acto knife can help get this started.

Quick Tip
Using a Seal-It-Pen along the edges of a decal helps prevent the vinyl from peeling or lifting. While this colorless adhesive dries in 15 minutes, it is best to wait 48 hours for the adhesive in the vinyl decal to fully cure before you go boating again.

0

SUPERBOWL MEMORIES

Posted On: February 01, 2017


In  Superbowl III, Joe Namath and the JETS shocked the establishment and cemented the SUPERBOWL as a must see event.

                                                                               New York Jets

                                                              16

                                                             VS

                                                   Baltimore Colts

                                                              7


We’re talking 47 years later. At that time, I knew the importance of it, I didn’t know beyond being in the now at the time.

Weeb Ewbank didn’t change the routine from the regular season, no curfew until night before the game – what did you do at night? Go out? Stay in the hotel? Hounded by fans?

I knew what I was saying (with the guarantee).It was an accumulation of being told individually and collectively that we were going to get killed. It was a no contest. I was angry, I was tired of hearing that. It just so happened he pushed a button, I just said ‘hey, I got news for you man. We’re going to win. I guarantee it. ‘ He pissed me off

I meant it so sincerely (waving my finger No. 1),going off that field I was able to look up, I usually ran with my head down, my posture wasn’t that great, I looked up and I saw all these people above the tunnel, screaming, waving their hands, the smiles on their faces, man it was-- that was the statement, we did it. the AFL. We did it, we won the championship. I never saw so many happy faces in my life. I can see them today. That’s what inspired that. Just raising that hand. That was the only time I ever raised my hand, making that gesture. Never before in any level did I do that. The finality of that – we finally got there. Yeah.

I do remember it was the physical feeling of having done it.

Fortunately we had been in some other big games, been in locker rooms before when beaten rivals, all meant a lot to us. The locker room was very happy, after leaving the locker room and getting in the car with my friend, Joe Hirsch (I think this is the spelling) We still kept the regular routine. Joe would drive us back from games at Shea. We got in the car with Joe and my girlfriend. As we’re driving along, my body was so alive. I just burst out with laughter. It would quiet down, Joe didn’t say anything, he was a quiet guy. We’re riding along, I would just explode again. I never had my body feel that way before. Then when we did get back, to the hotel my mind’s eye, Willie Lanier, Emmitt Thomas, there were three Kansas City Chiefs waiting there to say nice going.

0